

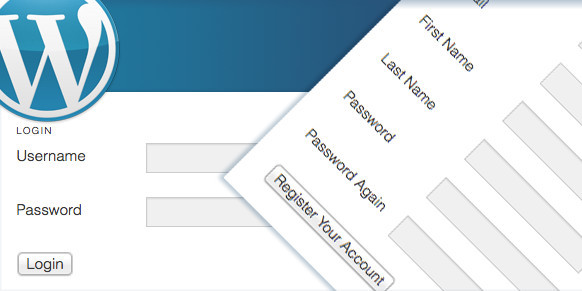

WordPress default login option redirects users to the WordPress dashboard page and this is good for those users who comes to your website to contribute to your website, for example, writing articles, SEOs and others, but if you’re providing services like social networking website, comments allowed after user logged in and others then you should provide the front-end login.
You can add front-end login option with two methods first one is to create a custom login page with code, and another one is to make use of a plugin.We recommend you to use the WordPress plugin to add the front-end login option.Using plugin makes this process easy and can configure everything easily.
Steps to Add a Front-end Login in WordPress
Before starting the using WordPress plugin, you have to setup the plugin appropriately to working better.Now go to your WordPress dashboard and install the plugin named “Theme my login“.It is the best plugin which can add front-end login in your WordPress website.It has alternatives too, but we suggest you to use TML(Theme my login).
Step 1: Get the plugin working
First of all, install the plugin and now activate the plugin by clicking the activate now button.After you activate the plugin now go to your pages option from your left side menu panel.
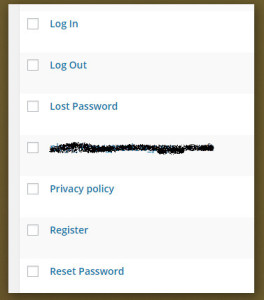
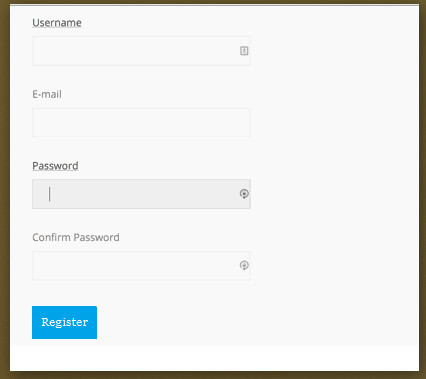
Here you can see that few pages automatically created like Login, logout, reset the password, change password and register.These pages will automatically create by the plugin when you install the TML plugin.

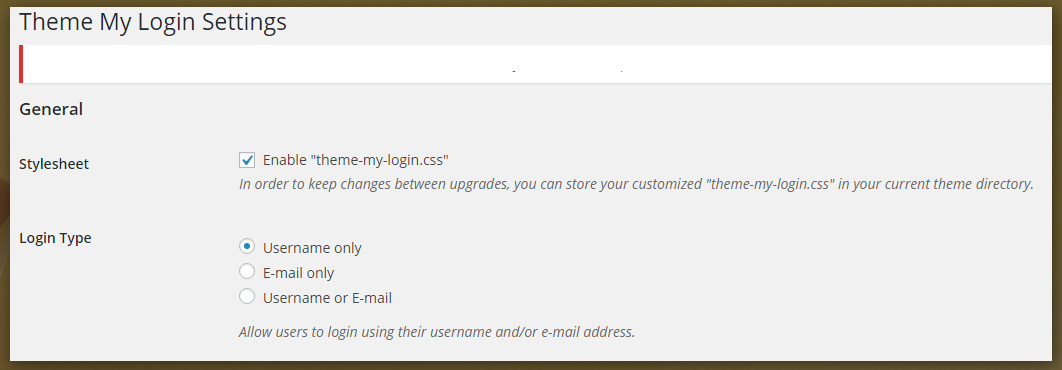
Step 2.Configure the General Settings
Now it’s time to setting up theme my login plugin, we start with the general settings.You can find the TML link in the left side menu panel.Click on the TML option and after that you will redirected to TML dashboard pages where you can configure the general settings.
In general settings, you find two option ‘Stylesheet’ and ‘Login type’.The first option allows you to load plugin’s default stylesheet. If you are having trouble with the display of forms on your website, then you can uncheck this option.
And for the login type, you can choose any one option from these three options.
– Login with username only.
– Login with email only, which means users can login by entering email only.
– And third is Login with either username or email.

Setting up the TML Modules
Theme my login comes with module packed into the plugin.You can enable and disable the modules according to your need and recuirements.To configure the theme modules you have to enable first and after that you can find the setting page of module in the left menu panel of your WordPress dashboard.
Let’s take a look to the modules.
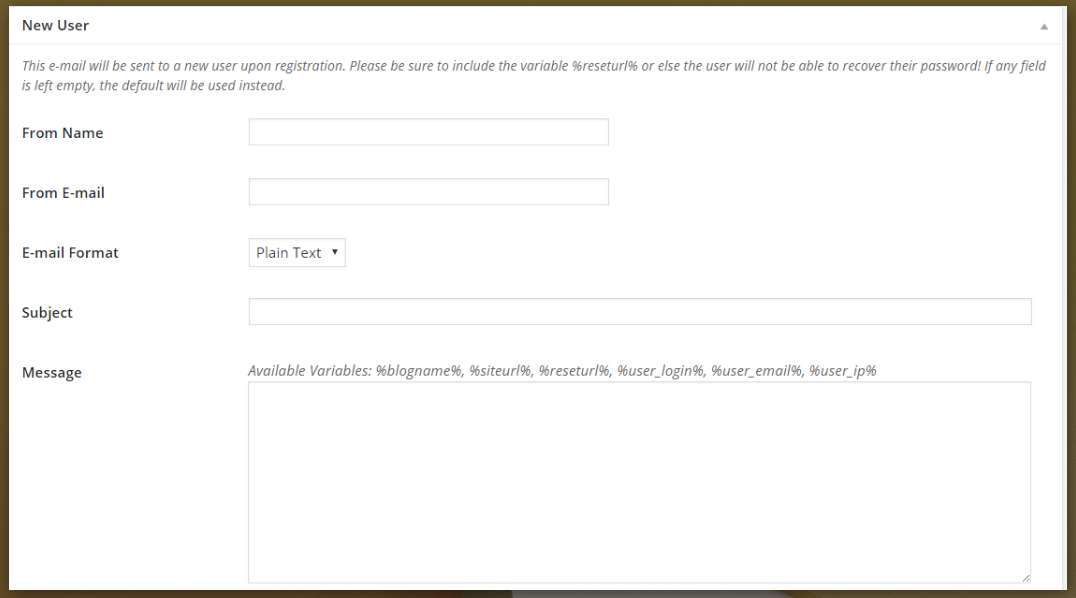
1.Enable Custom E-mail
This module allows you to enable the custom email option.It allows users to change the emails sent by WordPress to users and site administrators.

2.Enable Custom Passwords
In this module, you can tell users to choose a password during registration, by default WordPress sends users an email asking them to visit your website to complete registration by setting up a password.
Visit Custom Password Module – TML>>Custom Password.

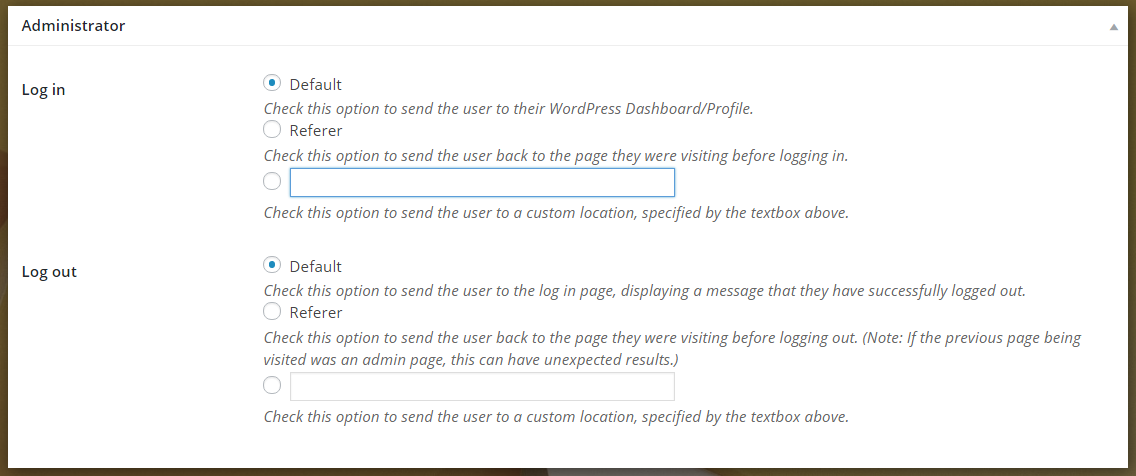
3.Enable Custom Redirection
By Default whenever a user login to WordPress, it redirect users to the WordPress dashbord, but by enabling this module you can choose the custom page or link where you can redirect your users after they login.

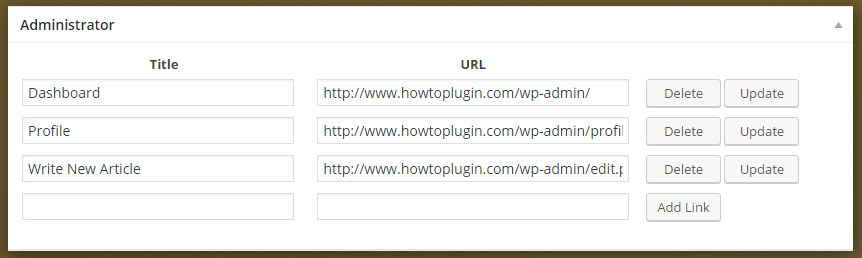
4.Enable Custom links
Custom links module allows you to add custom links for users. These links will be shown in Theme My Login widget. After enabling this module, you need to visit TML » Custom Links tab to edit links.

5.Enable reCAPTCHA
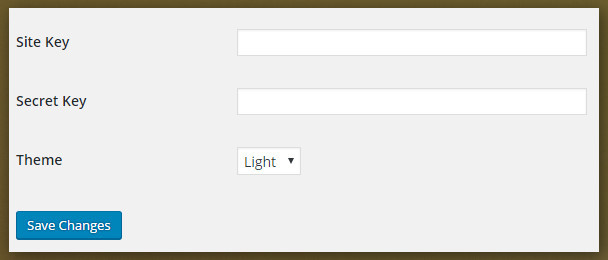
As you can see the name ‘reCAPTCHA’, it tells everything that this module is related with the security regarding registration and login.Enabling reCAPTCHA prevent spam registration on your website.
It is an essential module which helps to secure your website from fake registration.You just need to create Site key and secret key, you can do it by visiting reCAPTCHA’s website.
Now enter the Site key and Secret key in the text box and save the changes.

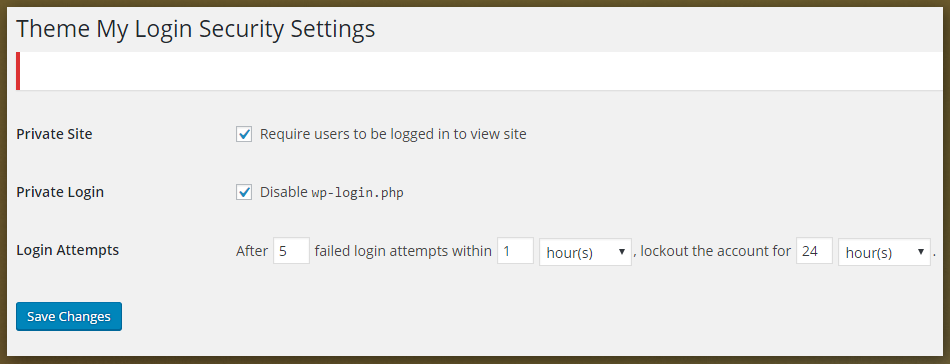
6.Enable Security
Enabling security module helps your website from brutal forces which always looking for a chance to get down your website.This module has three options ‘Private Site’, ‘Private login’ and ‘Login attempts’.
– Private Site : This option is for those website owners who wants to share the website data and service for only users who have already signed up or needed to register before using a website.
– Private Login : This option completely changes the wp.login.php page to another page which helps to secure your blog from fake login attempts by bots.
– Login Attempts : Many hackers try to login to your website through different username and password and limited login attempts prevent from spam login attempts by set the limited login attempts.

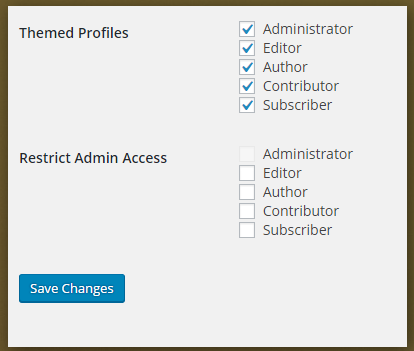
7.Enable Themed profile
This module comes with the ability to allow your users to manage their profiles from the frontend.You can also restrict the admin access from this module which allow and disallow the admin access.

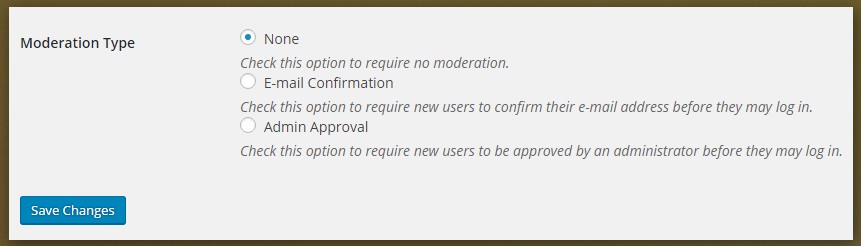
8.User Moderation
With this module, you can enable email confirmation or choose to approve all new registrations manually.It has three moderation type.
– No confirmation.
– Email Confirmation.
– Manually Approval by Admin.

Front-End Login Sidebar Widget
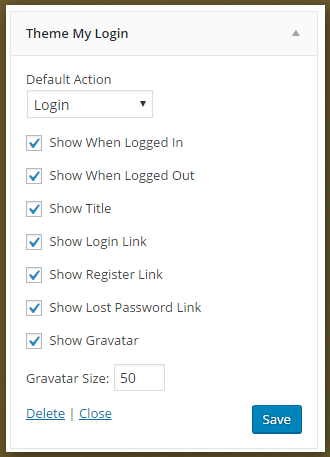
Theme my login allows you to add a sidebar so users can easily log in from the sidebar login form by entering their login details like username and password.Adding theme my login widget in the side is very easy.
- Go to “Appearance” > “Widgets”.
- Find the widget named Theme My Login, and drag it to any widget sized area.
- Select a default action, select the links you want to show in the widget, and decide the gravatar size. The destination of the links should be changed through the “Custom User Links” module which will be discussed later.
- Click on the “Save” button.

Final Words
In the ending of this tutorial, we’re hoping that you loved this tutorial.If you’re looking to add facebook and another social network button in the front-end login option then wait for some time we’ll come soon with new tutorial related to your need.
About Post Author

