


WordPress makes it possible to build social network easily, you just have to install a plugin and set up to read the tutorials and you done.It’s simple, now we’re going to create a social networking website using Peepso plugin.
What is Peepso?
Peepso is a WordPress plugin which build your own beautiful social networking site in few minutes.Peepso is both free and premium plugin, but it’s good to purchase its premium version.Premium version have more features than free like you can enable sharing photos on wall stream, private message feature, you can enable the feature of uploading and sharing videos and much more.
Things you needed
- Zawaj WordPres theme specially designed for Social networking website.
- Peepso WordPress plugin for Social network.
1.Social Network WordPress Template
If you’re serious to create your own social network, then do not compromise with a un-compatible theme.You should go with a Premium WordPress theme which is specially designed for Social networks.
I recommend zawaj, a specially designed theme for BuddyPress and any other Social network plugin.
2.WordPress plugin for social network
We’ll know WordPressp plugin making our life easy, but which plugin should you choose? I recommend you to use Peepso WordPress plugin.Peepso’s premium version has great features like private messaging, update stream, uploading and sharing photos, videos and links to
Step To Creating Social Networking Website
Before starting you have to purchase a Domain and hosting because without hosting and domain name you can’t create your website.Domain is the address which is used to open your website like howtoplugin.com.
Step 1.Now, Install the WordPress from the Cpanel.Simply open a browser and enter yourdomain.com/cpanel.Change youdomain.com with your domain name which you recently purchase.
Step 2.After installing WordPress, open admin login page and login to your blog.You can find login page by just entering yourdomain.com/wp-login.php.
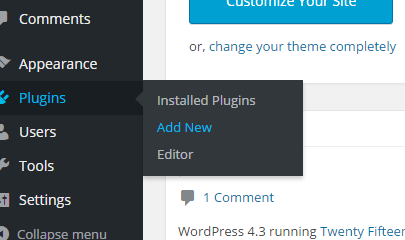
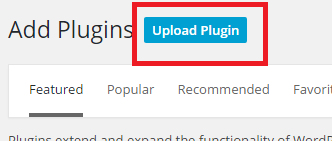
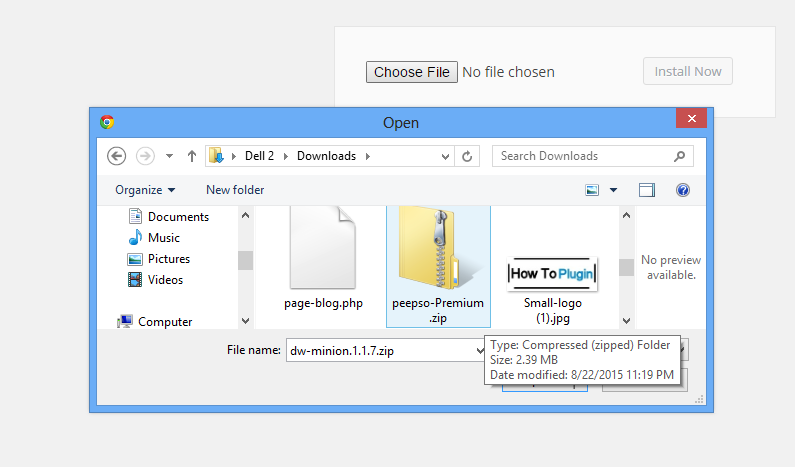
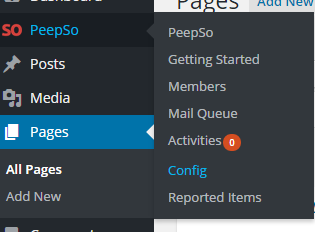
Step 3.Next step is installing the Peepso plugin.You’re on the dashboard page of the WordPress, click on the plugin>Add new from the left sidebar menu, click on the upload button and select the Peepso plugin which you recently purchase and downloaded the .zip file.Now click on the install and activate the option.
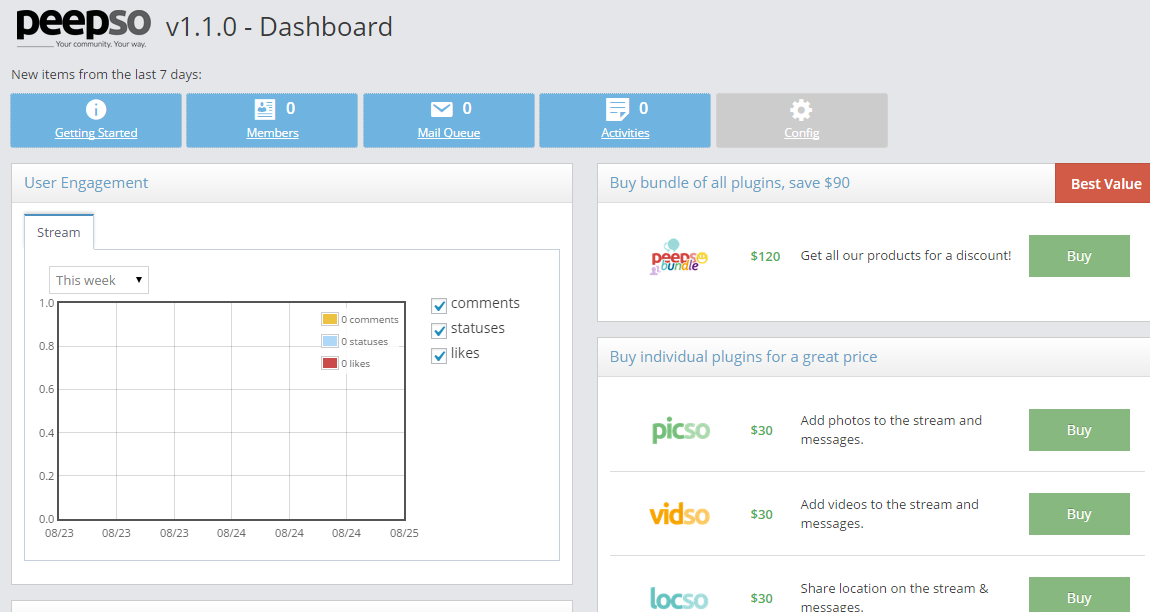
Step 4.It’s time to configure Peepso Wp plugin and make your Social network.Open your blog Dashboard and click on the Peepso option.You can find Peepso option easily in the left menu bar or open from installed plugin page.
Step 5.Open Configure Page.Leave the setting default, but if you want to change the settings change on your risk.
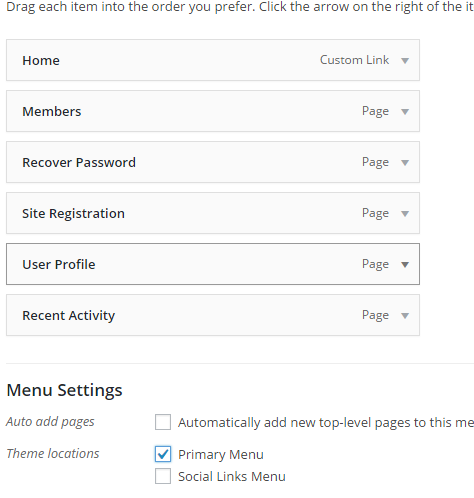
Step 6.Open menu section Dashboard>>Appearance>>Menu.Create a new menu with the name “Menu 1”.Select the page which you want to add in the menu and tick the primary menu box and click on the save button.
Step 7.Now install the WordPress theme and design according to your need.
About Post Author

